Thursday, June 13, 2013

Wedding Food Pix

We hired a caterer that we used for Katz wedding in 2006. The daughter of the owner was a teammate of Stephanie in high school, and she ended up taking charge of our event.
So Desiree of High Five Catering was the girl. She helped plan, and took our ideas and ran with them. She did a really good job.

 We had the drinks set up on the bar for the outside kitchen. Lots of soda's, water, and a pineapple punch in a beautiful silver punchbowl that I borrowed from a dear friend.
 Kathryn did the chalk art including this menu sign. We chose not to have printed menu's at the place settings.
 The caterers set up things pretty well with us gone to Oakland for the wedding. The blue tablecloth was wrong side out, and the chair covers for the head table weren't put on, but it was really because I thought I'd have time in the morning to tackle this project before I left to the temple.

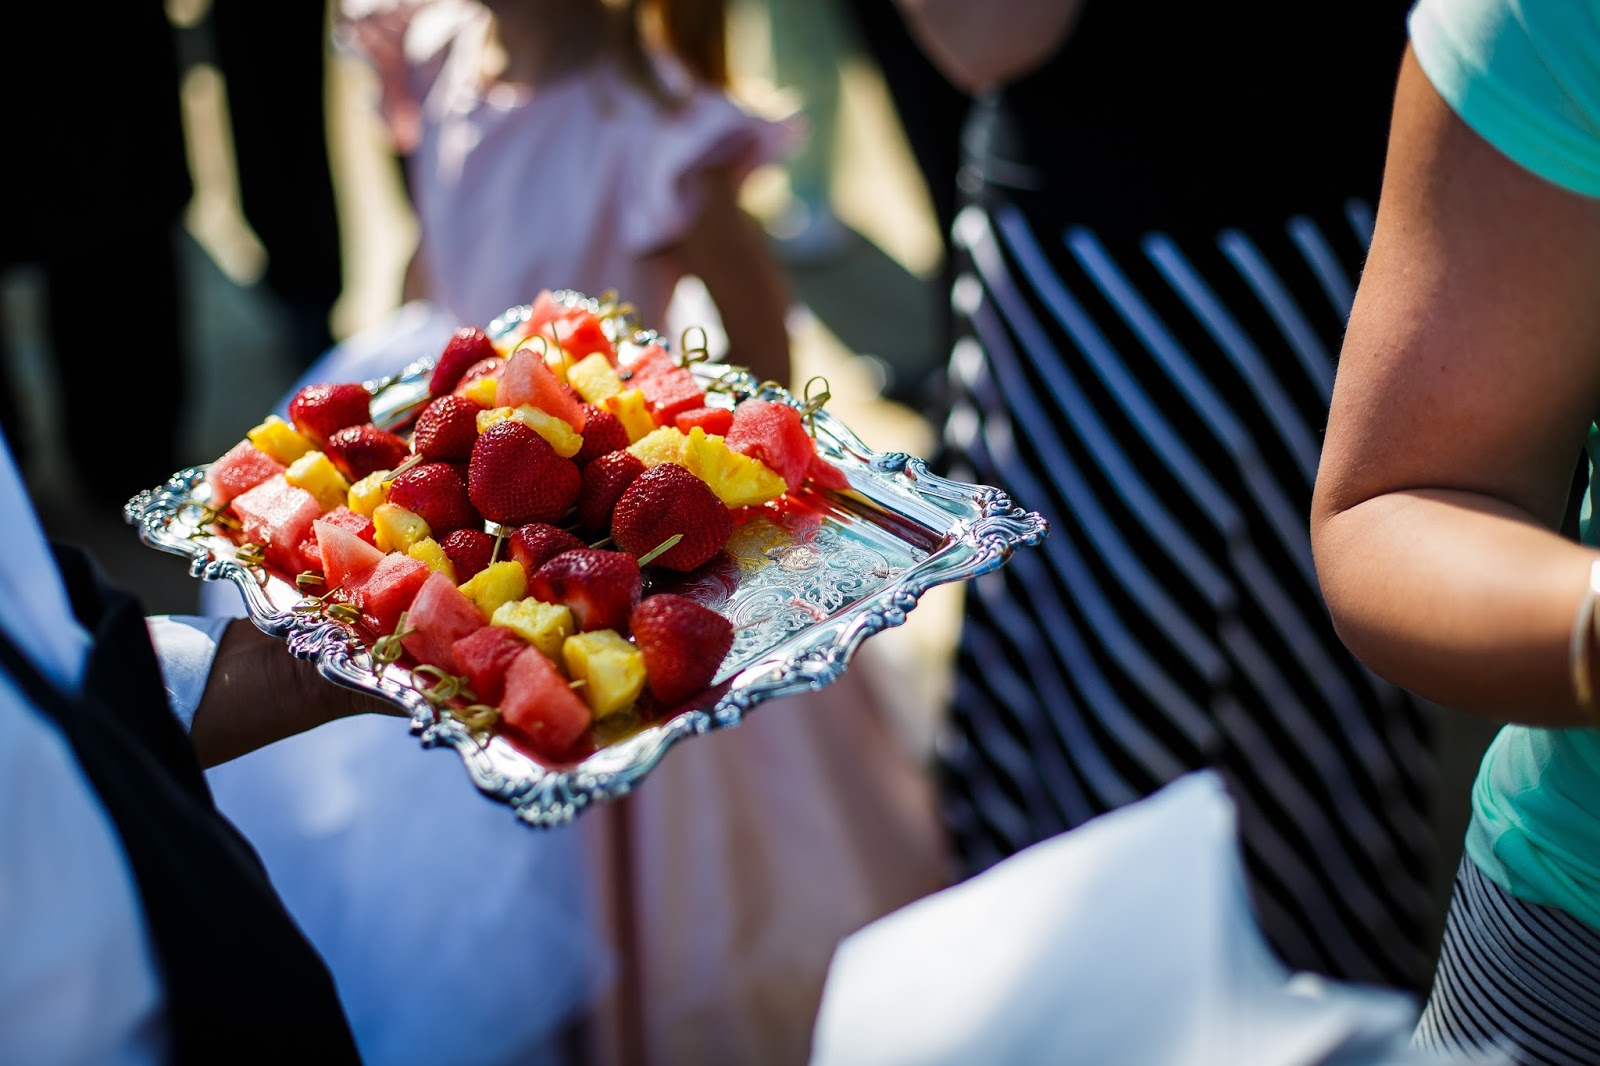
 A little fruit and bruschetta to start us off. The hit of the appetizers was the sushi rolls that the groomsmen seemed to wolf down. I had told the caterer that sushi was a favorite of my DD and her husband, and they did it up well. Passed hors devours were on silver platters that I had borrowed from various friends of mine. Thanks to all of my wonderful friends.
We served the main meal family style, and had strawberry salad, salmon, beef tenderloin, grilled asparagus, roasted fingerling potatoes and focaccia bread. The food was all very yummy and we got a lot of compliments. We did have issue with having just one thing at a time delivered to the tables. I was nearly finished with my salmon before receiving anything else to eat it with. I think if we ever serve a meal like this again, I will make sure that each respective table receive their full meal to pass around the table at the same time. 17 tables can't all be served at once and I'd rather each table have their full meal than have all the steak delivered to all the tables, then all the asparagus, etc.

 Not a lot of pictures of food were taken, but here's a lovely one of the salad.
The cake was done by our friend Jen of Jen's Cakes in San Jose. She had her wedding reception at our home in May.
We also served yummy chocolate covered strawberries that my friend Cindy made for us. She did a great job.
 And cotton candy, which the caterer had to figure out after my request for it. We used sturdy paper straws to put the little cotton candy lollipops on, and they were flavored two ways with raspberry and coconut. Both white.
Food did turn out really well. Thanks everyone.

Tuesday, June 11, 2013

Bridesmaids Dresses (Wedding Sewing 2)

Sewing for children is easier and more forgiving than fitting and styling for adults in my opinion. I suppose this really just shows that my talent and knowledge doesn't lie in the fitting process.
I always have a certain idea in my head and just have a tad bit of difficulty seeing that idea come to fruition. There are probably several reasons for this:

1.  Finding a pattern that mimics what I have in mind is nearly impossible, and combining patterns doesn't always seem to work for me, even though I never make anything these days without combining at least 2 patterns.

2.  The styles that are popular have to be modified in order to make more modest clothing that I am trying to come up with. Bearing this in mind, I have to add some sleeves and raise a neckline or lower a hem without making the garment look frumpy. This is my biggest challenge.

3.  I haven't sewn enough for different body types to feel comfortable changing lengths, widths, shortenings, etc to ensure the best fit for each.

But ... A certain daughter of mine really wanted me to sew her wedding gown and if I agreed to sew her bridesmaids dresses instead, then she would let me off the hook.  Well, it's sort of a story along those lines anyway?

 So my trip to the crazy full fabric store "Fabrics R Us" found many different types of fabric in the turquoise, or Tiffany Blue, or Robin's Egg Blue that Steph wanted for the main color on the wedding day. I picked up some satin polyester, some poly chiffon, and some opaque lining poly to try out for different applications on the day. I also got nude lining samples and white lining to try with the chiffon, to see which one would look the best in a flowing long dress.
 Then I found some great crystal designs as well as individual sew-on crystals for a belt to match/blend with the brides belt.  I sent example pictures to her so she could give me her input on what looked the best and what was her vision of the bridesmaids dresses. We both thought the belts should be the same color as the dresses, and I looked far and wide for a wide matching grosgrain ribbon but in the end I couldn't find 2 1/2 inch ribbon even in satin that was the right color, so I made sashes out of the fashion fabric so it was an exact match.
 Stephanie's friend Nina was in town from Germany in February, so I quickly made up a dress like we had in mind for her to be fitted with. The cap sleeves are kind of a tulip type sleeve where there are two halves that overlap at the top of the shoulder coming off of the sides. I put pleats in them and we liked the look, so we decided to kind of mimic that in the bodice of the dress.
Here it is not quite put together yet, just to fit it on her. After that I put in the zipper, attached the sleeves and ironed more cover fabrics for the linings. I ironed those pleats in for HOURS, and they looked terrible to me when tried on, so I ironed a different direction and tried to get it to hang just so from the shoulders to the waist.
All 5 of them were somewhat different in the bodice pleating, because I never was happy with how it looked on the finished dress, so I would change it, hoping for a better result. I never really got one, but the little sleeves were cool and so was the flowing full skirt, and ultimately these 5 girls are beautiful so they really look good in anything they wear, so they were going to be just fine.
Here is one dress ready to try on. I would not put the zipper or sleeves onto the dress until after trying it on the girl, so I could easily change things up if necessary.
We ordered wooden hangers with the girls names on them so they could keep them apart if they were all in one place on the wedding day.

 I did like the look of the sleeves.
 The belts made on the fashion fabric turned out fabulously.
I also got a new tool for my sewing room for this project. It is a heat cutting tool. So no hem in these dresses needed to be sewn. I just literally cut the bottom off with this tool and no fraying.
It made them move in a flow that was even better than if they'd have had even a little rolled hem.
 I had to send many pictures to Stephanie for approval on design.
 Do you want the belt in a bow on the back?
Or just tied in a knot?
Maid of Honor, Kathryn, had her dress made last. (Cause she had a baby almost 3 months previous, so I concentrated on the other girls dresses first)
Very cool picture they posed for here.
Patiently waiting for the Bride and Groom to come out of the temple after the wedding/sealing ceremony.
Here are the 5 beautiful besties of the bride. Nina, Brittany, Kathryn, Hilary, Chelsey.


Monday, June 10, 2013

Weddings Ahoy - Steph Ties the Knot

I have not disappeared from the planet, although it may seem like I did. I'm still frustrated and confused about where and how to manage my pictures and yet I need to post many things. I'll start with the most important and then go bad and forth between the present and the past.

So .. Our daughter Stephanie got married June 8th and I want to post a little something about this magical wedding.
Here are just a few pictures from the day.
Steph and Jon
Outside the Oakland Temple following the ceremony.

Our photogenic couple

Stephanie's family present on the happy day

Lads and lasses
 Our backyard pre wind storm
Head table
Amazing flowers 
Patio fireplace mantle 
Kathryn - "maid of honor"
Ring Ceremony

Wedding Sewing 1 - Brides Dress REDO

I was planning on making many dresses for our DD's wedding. I'll do a post about each of the types. But I was not planning on doing the most important dress sans perhaps a little alteration after we received the dress in mid May. Plans change.
So here's my list.
1. Brides Gown - redo the whole bodice lining and reapply beading
2. Bridesmaids -5 of them
3. Flower Girls - 4 of them - matching accessories for little grandsons (2)
4. Mother of the Bride (Me - MOB)
5. Temple Dress for Bride
6. Alter my Wedding Dress for Steph to wear for the ceremony

Today I'll show a little of what I had to do to Steph's dress to bring it up to her dream.
It arrived from the shop in a built up modest bodice that looked beautiful and not frumpy. We had ordered the lace build up on top of the bustline and down the cap sleeves with a nude liner so the lace would really pop. Lace that is on top of it's own color of liner is pretty, but if it is lined with a contrasting color you really see the design of the lace.
Here are a couple of examples:
 This fleshy colored dress has obvious lace, but if it had a dark or light lining, the lace would show off more, like in the next example.
This lace shows all the little details of the design. It is because it has a darker lining than the off white lace.

Well... we were trying to get that lace to pop and instead, the design shop which is a very reputable one called Casa Blanca, just lined it with an off white that they apparently had in their shop for off white orders.

 I kinda was disappointed when I first saw the lining, but the rest of the dress was so cool and Stephanie-esque that I just hoped she'd think it was just right. (and sit right down to eat the porridge)
I mean, just look at that train and whole skirt. It is made up of vertical strips of lace, organza and these are set set about 1/2 inch apart and ruffling all the way down to the ground and beyond.
very up to date, yet classic. We loved it on her.
However, it did kind of look like they had just picked up the closest off white they could find and it didn't show off the lace hardly at all.
When she came home a couple weeks after I received the dress, my suspicions were confirmed and we went hunting for "nude" colored fabric to line the top bodice in.
Here are the fabrics we used and didn't use. The pink on the bottom left is the inside of the dress next to the body. The light off white on top was what the dress came with under the lace, and the tan color,  middle right is what we used for a better result under the lace. This underlace and the lace together made up the "fashion fabric," or the fabric that the dress appears to be made from.
I had to take off all the bug surface beading that was attached to the liner. I'd say that was about 1/3 of all the beading, but the threads were all connected to all the beading, so they just kept falling off of the threads whenever I moved me or the dress. Probably 1500 beads fell off.
The lace that connected the pieces also had to come off and then be reapplied. These were the time consuming jobs of the project.
I also had to take off the sleeves, top back bodice and top front bodice. Then I took those pieces and used them for a pattern to make new pieces out of the darker nude fabric. After attaching these new pieces, I could sew up the seams and just treat the new nude/lace combination as the outer fashion fabric.
 Now you could see the contrast and the lace really shows off well.
Stephs measurements had been taken previous to purchase, and we had ordered the dress to come in three different sizes. At least that was how the dress expert at the bridal boutique needed to express it in her order.  One for the bust, one for the waist, one for the hip. Stephanie's bust and waist were the same size and her hip was 3 sizes larger.
Well the fit was really pretty good, except the bust was too tight, and the waist and hips were too loose.
You are supposed to be able to alter these dresses using just the two side seams, but the dress had been cut too small in the bust, so didn't have enough fabric in those side seams to take out. I probably got another 1/8 inch in each of those 2 seams (times 2 sides of the seam) for a total of 4/8 or 1/2 inch total for the two seams and we needed more I let the bust line out. So I had to take out the princess seaming down the bodice front and back to get another inch of space for her.
They probably didn't believe the measurements at the sewing shop and so cut a more smooth connection between the bust/waist/hips. It should have been one size larger in the bust, then down one size then up 3 sizes, or something like that.
Oh, I forgot to mention that the zipper top half and the buttons down the back had to come off for the replaced liner. Yeah - I forgot to mention that. Therefore more beads falling all over the couch.
To solve bead loss somewhat I had a cereal bowl on my lap at all times and when I stood up, I would quickly turn around to the couch where I was sitting on a plain colored tightly woven blanket and let beads fall. My new rule for anyone leaving the couch area was that they had to locate a few beads on the shag rug below my work space before the person vacated their spot.
Good rule huh?
Well before the end of the 3 day weekend that Stephanie was home for her bridal shower, I had the large portion of the dress fitted properly and put back together. Then I made another rule for myself. "Whatever I can get done on the rebeading and lacing of this gown THIS WEEK, I will do. Whatever I don't get done, will NOT get done." That is all the time I could use because our house was hosting a wedding in 2 more weeks, and I had other things that had to be finished.
I was able to put many beads back on this beautiful dress, and tie off other loose ends of thread throughout the next week, and then I had to be satisfied that it was done. The largest beads were all back on unless lost, but there were many smaller beads that are in a little baggie now. They were difficult to even find a needle to get through them, but are like little mirrors of reflection in circular lines throughout the dress. Very elegant addition to the lace embellishment these beads are.
At least they were not still falling off the dress in droves. Just a few here and there on the wedding day fell off of their unsecured threads.
And she looked gorgeous!

Thursday, February 28, 2013

Katz is 27 - Apron Time

I never made Kathryn an apron and I think she is the last one of my girls to get one, so here it is. I found this great fabric last year when the Hubby and I went to the quilt garden display in Livermore.
the chevron is my fave. I wrote a little about that beautiful nursery garden here. The ancient oak trees were probably the most impressive part of the whole event.
This picture is of the front pocket and I made a funky large pocket with just one initial and a new whisk embroidery pattern that I had purchased previously.  I was excited to move the whisks around and change their sizes so that they fit on the pocket and around the "K" just right. I'm getting more and more comfortable with my Bernina 830 embroidery machine. IT IS AMAZING.
Katz is pregnant right now, so the apron will have to wait a couple months to be worn.
All kinds of funky embellishments make it look both retro and modern at once. It was a fun one to put together. 


Tuesday, February 26, 2013

Project from 30 Years Ago

When I was recently in Colorado at my sisters home, I noticed al long (too long) skinny baby bunting that sorta looked familiar.

Sure enough, when I looked at it a bit more closely I thought that at one point about 30years ago I remembered staring at this yellow yarn for a few weeks as it passed through my fingers and onto the knitting needles to make this for my new little nephew. 
My first attempt  at  cable stitches and I see a few mistakes. I'm sure I still see plenty of mistakes in my work, but the noticeable ones are now easier to fix than they used to be, as my expertise has increased.
I probably knitted a little tighter then than I do now and I also followed the length guidelines without taking that into account. Hence the longer than wide result. Cute little hood.
I think todays patterns of a bunting would include a little slit near a third of the way up to put a seatbelt thorough, but back then nothing of the sort would have even been thought of yet.
What a nice Aunt I was. ;-)
What a nice sister I have to have kept it for posterity.