Saturday, November 3, 2012

Who Does This?

I am finally finished with a project that was a pain. I replaced the weather stripping on the older windows in our home.
It all started 4 years ago when we were remodeling out front living/dining rooms and entryway. I noticed the old stripping was fragile to the touch and would basically fall apart if you wiped or cleaned the window edges.
I couldn't find anything to replace it with at the hardware store except.

Something like this foam, that was sticky on one side and not with any notch type thing that fit into the grooves around our windows. I then asked a window seller that we had purchased our front door from about this and he indicated that he could get some for me. 

He ended up selling us a couple hundred feet of this grey plastic seal, and I hired Michael to put it in for me.

It never got done. My boy had it on his "list" of things to do for cash the summer after his high school year as well as the next summer (5 months) before his mission but ...... it didn't get accomplished.

So this past summer we were painting the house which was part of the snowball affect with the other massive job we were about, and I again had to address this window cold leaking issue. Now I could not find the original stripping (the Hubby had no idea what I was even talking about, even though it had been an issue for 3 years and I had fought Michael about it numerous times. Go figure.)
Was that even a sentence?
So I found some online that was white and ordered 15 feet of it to make sure it was the right stuff before I ordered more.
It was the right stuff. Starting in Michael's room I fixed one and a half windows.
And then I ordered 200 more feet of this stuff.

Then I accidentally found our original grey stripping in the heater room of our home. 

Next, I sent back the 200 foot spool of beautiful white weather stripping.

So I proceeded to strip away, finishing Michaels, then the bathroom windows and the front bedroom.  
It took me about 8 hours on this particular day and so I chatted with various people walking past our house about what I was doing and no one even knew that this task should be on their radar. Several of the windows had stripping that was gone completely and the bees or wasps had filled up other areas of the small tubing with some sort of crunchy stuff. There were large holes in lots of places, and it was generally completely rotted out where the sun shines on it. This is mainly on the East and South side of the home, where the sunshine is at it's brightest and best much of the year.

Including the day that I had selected to put it up. It was HOT!

So, I ran out of the stuff.

Ordered 30 feet more.

Put the rest of it up today and ...

DONE - nearly 4 years later. Aren't you excited that you don't have to continue reading about this gripping subject?

Check!

Wednesday, October 24, 2012

Finality

I am finally going to show my finished pictures of the back yard project along with "before" pictures so you can compare.  Hopefully I can show the best parts of this yard and you can refer to the before pictures for a total perspective of the change.

The first before picture is from our master bedroom looking out onto the old planter.
That section of planter has been replaced with a big ol' kitchen, and although this was the one design issue we weren't sure about, it now doesn't seem to bother us waking up to stone and metal.
This next old picture is looking toward the master bedroom at the other side of the original planter. Our kitchen consisted of the big barbeque.
The kitchen is bigger than the planter was, and the main large planter is still there and even larger than before.
Here were Kara and Lena standing where the main patio meets the brick.
Vantage point from the kitchen window toward the pool house (casita).
New entrance to the pool house. Wider stairs and nice solid landing at the top. Our dog house area is now a planter. (We haven't had a dog for 5 years, but that is still what I think of when I look at the planter.)
The sidewalk and planting area at the house end of the pool, were where the biggest change was planned.
Sure enough, it is a pretty big change. This is where we added a whole covered room, fireplace, etc.
The old basketball standard on the southwest end of the pool,
was where the plant on the left of this next picture was located. This overflow fountain is on the direct south side, parallel to the house. The point of the pool was straightened out to make room for this feature.
Remember the diving board? No longer there. Sorry Lexy, but in its place....
is a nice little retreat area. The smaller arbor with a nice sized cabana in it is a great place to watch the world rotate. You could read a book or take a nap here too.
Michael always enjoyed the deep end. (when the fear of shark attack was at its lowest point)
Now, there is less walking room and the concrete coping around the pool is a little smoother on the thighs than the old used brick.
Lexy jumping into the pool and towards GramVi from the hot tub area.
Same pool sans brick, cum stone. Love it!
Looking like some cold swimmers there.

Playing on the old stairs that are pretty identical to the new ones.

 Now we need to watch extra carefully, however, because the
pathway to the other side could be somewhat treacherous.
Remember our drainage problem?  Our Ellery played happily in the ever present puddle.

The plantings right next to the house are much more friendly than the concrete right up to the edge.
And there are no long lived puddles anymore. Pretty nice.
Looking toward the house from the big arbor.
These wind sculptures are great addition to the plantings.
Old brick edging went around the grass too.
Now it is just plain bark dust. (you can tell I am an Oregonian at heart sometimes.)
The Hubby got his Palm trees too.
Back to the brick. For a long time we had a walnut tree in the middle of this circular brick pad. It didn't survive being between the huge Ash trees after about 45 years.
This circle of brick has been replaced by a short sidewalk from new stairs coming up the center area of those two big trees.
Nice finely bladed fescue grass. I really like the look of it.
Below is the old. Not a ton of difference in this part of the yard. Apple trees are still intact.
Here's our vegetable garden from last year.
Here's the area transformed for next years garden. A little amendment still to be worked on.
The Hubby did a fine job building these raised beds.
From the large arbor looking across the pool to the smaller one. Notice the ball hoop on the left. It'll be a bit different game, but still doable.
The plants are happy as our weather is turning to fall. It is truly amazing how fast they have been growing.
Have you had quite enough of this? It was a bit of an organizational mess with the pictures and all, but hopefully this is a good comparison to before and after, for this large project.
All's well that ends well.


Monday, October 22, 2012

Warm Weather School Dress

Last year I made a cute little sun dress for Lena and  it caused some angst in her big sis. She liked it and wanted one too.  So toward the end of this summer, I thought, "I'd better make her one from this pattern because next year it could be too late and her tastes will start changing."
Well I never got a picture of her in it, but I'm gonna post it anyway. This color wave is probably not her favorite. I love these colors together and the main fabric lends itself to have purple and bright sagey green matching fabrics to go with it.
I also made up some flowers out of rick rack and funky buttons to match the thing.

Friday, September 28, 2012

Shuttle Pass

I do realize that I'm a bit late in the posting of this news event, about 1 week late to be exact, but I still think it's worth remembering.
Last Friday I was out in the back yard talking to the pool contractor who was finishing up the outdoor pool feature when I noticed a big white plane out of the corner of my eye. It had a small dark plane very close to it and that is what I was noticing.
Then… I looked at it.  I saw that it was the space shuttle "Endeavor" being piggybacked on a 747 jet liner and being accompanied by a little fighter jet. I got so excited and hollered at the pool guy to come and look. The jet was flying low and slowly down the South Bay where we live.
I had heard that it took off from Florida at the beginning of the week on it's way to a museum for its new home, but I didn't know it was going through the Bay Area.
  All the shuttles and the whole shuttle space program is being retired.
 This google map shows the route from Sacramento through the San Francisco then down to over Moffet Field and over the Hodgman house to LA area.
 Pretty cool huh?
I, of course, didn't have my camera and so I just looked online and found all these.
It was a beautiful amazing site.
The children in our local Daves Avenue Elementary School were expecting it's flyover and so they were all outside waiting to see it.
Apparently they all started chanting, "USA, USA, USA" and it was all spontaneous.
What a great country they all know they live in.
Again … pretty cool.

Tuesday, September 25, 2012

Peacock Costume

Tutu's in every form are the new little girl halloween costume. It seems that there are entire websites dedicated to these costumes. Check this one out. Ghosts and Witches, to Dorothy and Belle costumes are all being embellished with accessories after the initial tutu is decided upon.
Well, any who … Ellery is going to be a Peacock and so I was enlisted to make one of my very special tutu's. I then changed it up a bit and made another version.
Most tutu are made like this.
*   Take tulle any color you please and cut it in strips twice the length plus about 1 ½ inches you want
      your finished tutu to be.  Double the tulle up (fold it in half) and pull it around a strip of 1" elastic
      pulling the cut ends through the folded other end of the tulle. Continue around the elastic waist
      forming a circle.  Keep on going.  Keep going until it is as full as you wish it to be.
Then there are those that are made like this.
* Here you take strips of chiffon fabric and gather them like crazy row after gathered row and then you
     do it again on the inside of the skirt.  This takes an especially long time.
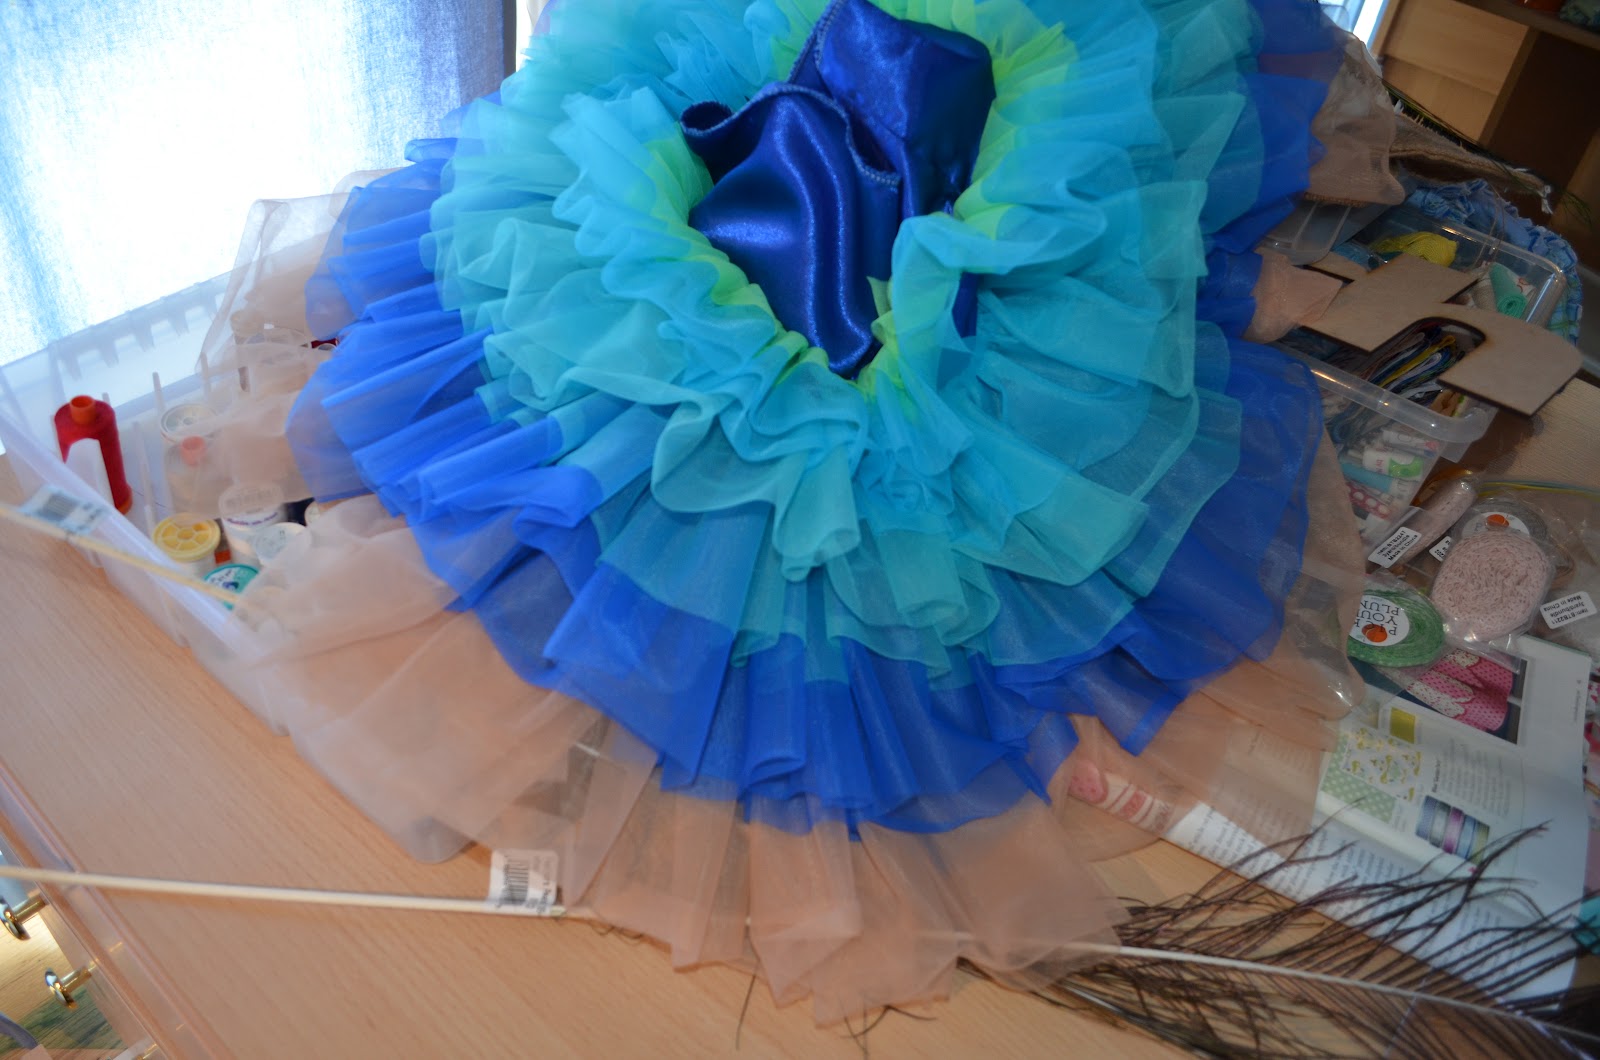
Now this time I decided to do the peacock tutu a little different way. I used the gathering chiffon effect and layered it with graduating colors going down toward the bottom. Not attaching them layer after layer to the layer just on top of them, but actually attaching them to lining fabric underneath the skirt so they all come off separately, making for a cascade of ruffles.
Kinda like this skirt. Basically a combination of several ideas.

 Notice the top layer is 2" of chartreuse green along with 4" peacock blue. Then I added a back layer to attach the next 2 layers of the same blue and teal. Then teal and royal blue, and finally royal and tan.
 The same colors that are in a peacocks feathers. See the feathers here and I then made a "tail" that fans out the back of the waist and connects with a ribbon bow in the front of the skirt.
I attached the feathers with glue and some ribbon and Katz is going to have to figure out how to get the tail to stay up around Ells shoulders after she tries it on her.

Fast forward 4 days. The postal service did pretty well.
So far she looks like she will just hold onto it forever.
 "Okay, you can take a picture of it down."
 "But I really like it better THIS way."
More pictures next month in full regalia. (Is that spelled correctly?)